Curtain Rods, Tracks, and Wave Rails: How Hardware Decides Your Pleat
The pleat you want depends on the hardware, not the other way round. Weight limits, mounting height, and the three ways a curtain actually fails, from Nalia's atelier.
When a client asks me for wave pleat curtains and shows me a rod they already bought at a big-box store, I have to tell them something they don't want to hear: that rod won't do it. Not because the fabric is wrong, not because the measurements are wrong, but because wave pleat needs a specific track and a decorative rod has never been able to fake one.
That conversation happens more often than it should, and it happens because of the order most people shop in. They pick a fabric, then a pleat, then go looking for something to hang it on. It works backwards. The hardware is what sets the ceiling on everything else: which pleats are even possible, how much weight you can put on the window, how wide the panel can go before it needs a second point of support. Get the hardware right first, and the rest of the project gets easier at every step that follows. Get it wrong first, and you find out at the worst possible moment, which is usually the day the curtain goes up.
Here's how I walk a client through it before we cut a single metre of fabric.
What each system actually holds
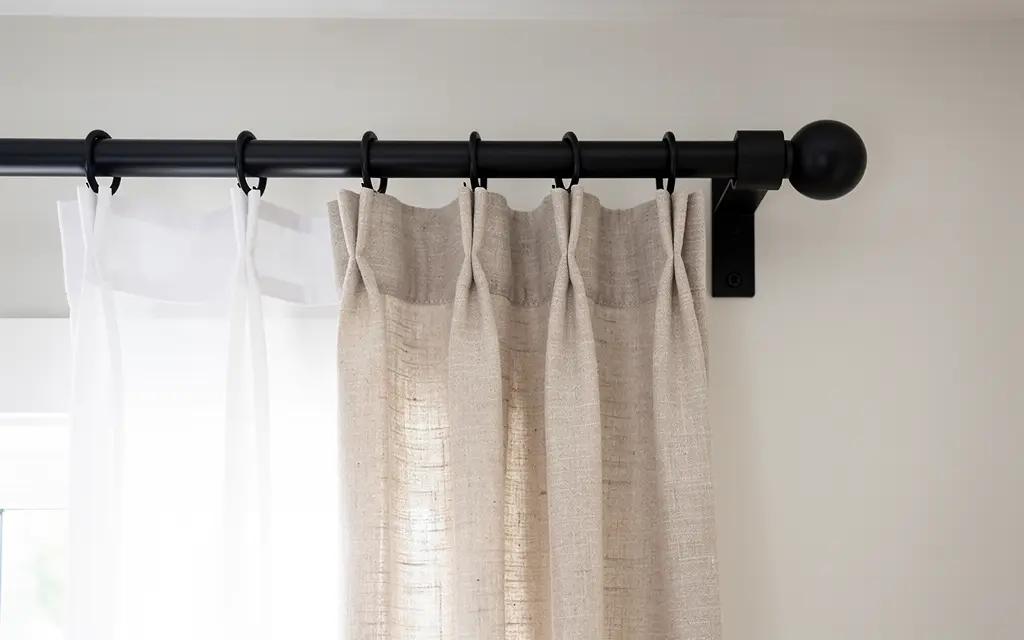
A round rod is the most familiar option and the most flexible for pleat type: grommets, tab tops, pinch-pleat rings, clip rings, all ride comfortably on a round bar. It's also the easiest to source and the easiest to get wrong on weight. Every bracket carries a rated load, printed on the packaging or in the manufacturer's sheet, and the spread between a light decorative bracket and a heavy-duty one is wide enough that the rating is worth reading before you buy. That rating also drops once the span between brackets gets long. A lightweight linen panel or a sheer never comes close to any of them. A pair of lined velvet panels on a wide window can pass one before you expect it.
A track, whether it's the kind that hides in a valance box or the kind mounted bare to the ceiling, spreads the load across gliding carriers rather than a bar flexing between two end points. That's why it's the standard choice for anything heavy, anything wide, or anything tall: the carriers don't sag the way an unsupported rod does, and a well-specified track will carry a fully lined panel that a decorative rod would refuse.
A wave track is a specific version of the second category: fixed-spacing carriers linked to each other so the fabric ripples in one continuous, even wave from end to end. More on that in a moment, because it's the one system that isn't optional if you want that particular look.
The rule of thumb I give clients is about proportion, not a fixed measurement. Once the unsupported span between two brackets starts to look long against the rod's own diameter, that rod wants a centre bracket. And once a window is wide enough that a lined panel would need several brackets to stay straight, I'm steering the conversation toward a track instead of a longer rod. More brackets fixes sag. It doesn't fix a rod that was never rated for the weight in the first place. Where exactly those thresholds fall depends on the rod, the bracket and the fabric together, which is why I would rather look at your window than hand you a number.
Wave pleat needs its track, full stop
I said it above and I'll say it again here because it's the single most common disappointment I have to walk back: wave pleat is not a heading style you can add to any rod with the right tape. It is produced by carriers spaced at a fixed interval and linked to their neighbours, so the fabric moves as one continuous ripple instead of independent folds. Sew wave tape onto a panel and hang it on an ordinary rod, and the waves come out uneven, wider in some places, collapsed and pinched in others, especially toward the centre of the panel where nothing is holding the spacing.
If wave pleat is the look you want, the track comes first, before the fabric is even chosen. I've written separately about what wave pleat actually is and why it rewards custom work, and the two pieces are meant to be read together: that one tells you what the finished curtain does, this one tells you what has to be on the wall before it can do it.
Where the hardware actually sits
Mounting height is the cheapest, highest-return decision in the whole project, and it costs nothing but two more screw holes.
The rule: mount well above the window frame, ideally halfway between the top of the frame and the ceiling, or right at the ceiling if the room allows it. Two things happen when you do. The eye follows the vertical line of the curtain and the room reads taller than it is. And light stops getting blocked by fabric stacked over the top of the glass, because the open panels now stack above the frame rather than in front of it.
Width works the same way. A rod or track that runs 8 to 12 inches (20 to 30 cm) past the frame on each side lets the open panels stack on the wall instead of on the window. That's the difference between a room that looks bright with the curtains open and one where you're still losing a third of the glass to bunched fabric.
A rod mounted flush on the window frame is the single most common thing I see when I go to a client's home, and it's also the easiest to fix. It costs two extra holes and about ten minutes.
Mounting into what
The hardware only holds what it's screwed into, and Eastern Townships housing stock is not consistent about what's behind the wall. Four situations, four different approaches.
Into a stud is the easy case. Studs run roughly every 16 inches (40 cm) on centre in most Quebec framing, and a wood screw into solid framing holds essentially anything you can build a curtain out of. The catch is that studs rarely line up exactly where you want a bracket, so plan for it during measurement rather than discovering the gap with a stud finder and a half-drilled hole.
Into drywall with no stud behind it needs a load-rated anchor, not the small plastic anchors or the screws that come in the hardware's own box. For anything past a light sheer, I want a toggle-style or metal anchor rated for the actual weight of the finished panel, which is heavier than it looks once lining and hems are added.
Into old plaster, common in Sherbrooke's older housing, is its own category. Plaster is hard and brittle: it holds a screw well until the anchor point cracks the coat around it, which happens more with a hand drill than a pilot hole and a slow, deliberate driver. I go slower on plaster than on anything else, and I tell clients to expect that.
Into a ceiling for a track puts the load into the joists or the ceiling structure rather than a wall stud, and it needs its own anchoring logic; a fastener rated for a wall is not automatically rated for an overhead pull. This is where I most often bring in someone who does this daily rather than improvise.
Two layers need real separation
A sheer under a lined curtain is two lines of suspension, not one, and that means either a double rod, two bars on one bracket, or two separate tracks mounted close together.
What matters is the gap between them. Too tight, and the front layer drags on the back layer and neither glides properly. A gap of roughly 3 to 4 inches (8 to 10 cm) lets each layer move independently, which means the wall bracket has to be deep enough to hold that spacing, not just wide enough to hold two bars.
Layered treatments also tend to sit higher on the wall than a single curtain, for a simple reason: both layers need room to fall freely, and the back layer specifically needs to clear the top of the window frame rather than bunch against it.
Return and overlap, and what skipping them costs
Two small measurements that never show up in a photo but always show up in daylight.
Return is the distance the panel wraps back to the wall at each end of the rod or track, instead of stopping flush with the front edge. Without it, you get a strip of daylight and a strip of the room visible down the side of the curtain, and at night, a sliver of the street visible from inside. A proper return closes that gap and also protects the lining from fading unevenly at the edge, since it isn't sitting exposed to direct light along that side.
Overlap is what happens at the centre, where two panels meet: they need to cross a few centimetres past each other, not just touch, or you get a vertical seam of light straight down the middle of the window the moment the room goes dark. I build roughly 2 inches (5 cm) of overlap into a standard pair, more on a wide window where the panels have further to travel to meet in the middle.
Both numbers get eaten by the hardware, not the fabric: a bracket set too close to the wall kills the return, and a track cut exactly to the visible width of the glass leaves no room for the overlap at all. This is why the finished hardware width is never the same number as the window width, and why I ask for the actual rod or track dimensions before I cut, not the window measurement alone.
Where a panel actually fails
Three failure modes account for almost everything that goes wrong after a curtain is up, and none of them are the fabric's fault.
A rod that sags in the middle. This is a weight problem disguised as a droopy-looking curtain. It shows up weeks or months after installation, not on day one, because the sag is gradual: the bracket spacing was fine for the empty rod and marginal for the loaded one. The fix is a centre support or a switch to track, not a heavier-gauge rod of the same design.
Brackets set too close to the window frame. This is the return problem from the section above, showing up as a physical obstruction rather than a light leak: the open curtain stack lands directly over part of the glass because there was never enough rod or track past the frame to let it land on the wall instead. It's invisible on an empty wall and obvious the first time the curtain is drawn open.
A track cut to the window's width instead of the stack's width. This is the most avoidable one and the one I see most in DIY installs. The track needs to account for return on both ends and overlap in the middle, on top of the visible window opening, and none of that shows up if you measure only the glass. A track cut to the glass width alone is short before the panel is even sewn.
All three trace back to the same root cause: treating the hardware as a fixed given and working around it, instead of measuring it properly before anything else gets decided.
No-drill options, honestly
This comes up constantly, especially from renters, and the honest answer has real limits.
Tension rods hold inside a recess, between two facing surfaces, under light load. For a cafe curtain or a short sheer, they're fine. For a full-length lined panel, they slip, usually at night, usually the first cold snap when the window frame contracts slightly.
Adhesive brackets hold a modest load on a clean, smooth, non-porous surface. On flat paint they can work; on older plaster or a textured wall, the hold is unpredictable, and the weight limit arrives faster than people expect. A single lined panel at 8.5 feet (2.6 m) tall is heavier than it looks hanging in a shop.
Frame-mounted clips avoid the wall entirely by grabbing the window's own casing. That solves the drilling problem in a rental, at the cost of giving up the mounting-height gain from the section above: you're back to hardware sitting on the frame, which is the exact position that loses light and stacking room.
My rule: no-drill is genuinely fine for light and short. For heavy and tall, it isn't, and I'd rather say that before a new curtain ends up on the floor than after.
What I supply and what I don't
To be direct about where the line sits: I make the curtains. I don't stock, sell, or install rods, tracks, or wave systems, and that's worth saying plainly rather than leaving a client to assume otherwise partway through a project.
What I do instead is tell you, specifically, what to buy and where to buy it, based on the pleat, the fabric weight, and the window you're dressing, and I ask to see the hardware, ideally already mounted, before I cut a single panel. When a client sources the rod or track themselves, I'd rather review a photo of it on the wall than guess from a product listing, because the finished length of the curtain depends on exactly where the fabric will hang from, and that's a detail a spec sheet doesn't always get right.
What this means for the cut
The hardware decides the finished length of the curtain, which means it decides the cut. The same fabric on a rod with rings, on a track with carriers, or on a wave system will not be cut to the same length, because the distance between the hanging point and the top of the visible fabric is different in each case.
That's why I always ask which hardware will be used before I cut anything, and why I'd rather see it mounted than take a measurement off a box. A panel cut for one system and hung on another comes out too short, or drags on the floor, and there's no fixing that after the fact in one direction.
If you haven't chosen your hardware yet, that's fine, leave the question open until we talk. We decide the pleat and the hardware together, and the cut follows from both. The pleat side of this same decision, what each heading actually needs and how it behaves day to day, is on the pleat types guide.